
The WP REST API has been the hot thing in WordPress since it was rolled into core in WordPress 4.7 a year ago.
It’s helped bring WordPress closer to where the internet is today, and it’s allowed people to do really cool things with their websites.
The REST API comes with the basic routes already set up, like posts, pages, comments, etc. But creating custom routes for custom data types can be a bit of a pain. And while the REST API team has some basic code up in the codex on how to create a new route, I didn’t find much other help in how to create and set up a custom REST controller.
So that’s going to change with this tutorial on how . It’s going to be basic, but sometimes basic is the best. I’ll walk you through how to set up the class and permissions and create, read, update and delete items.
Let’s get started.
Setting up the class and setting permissions
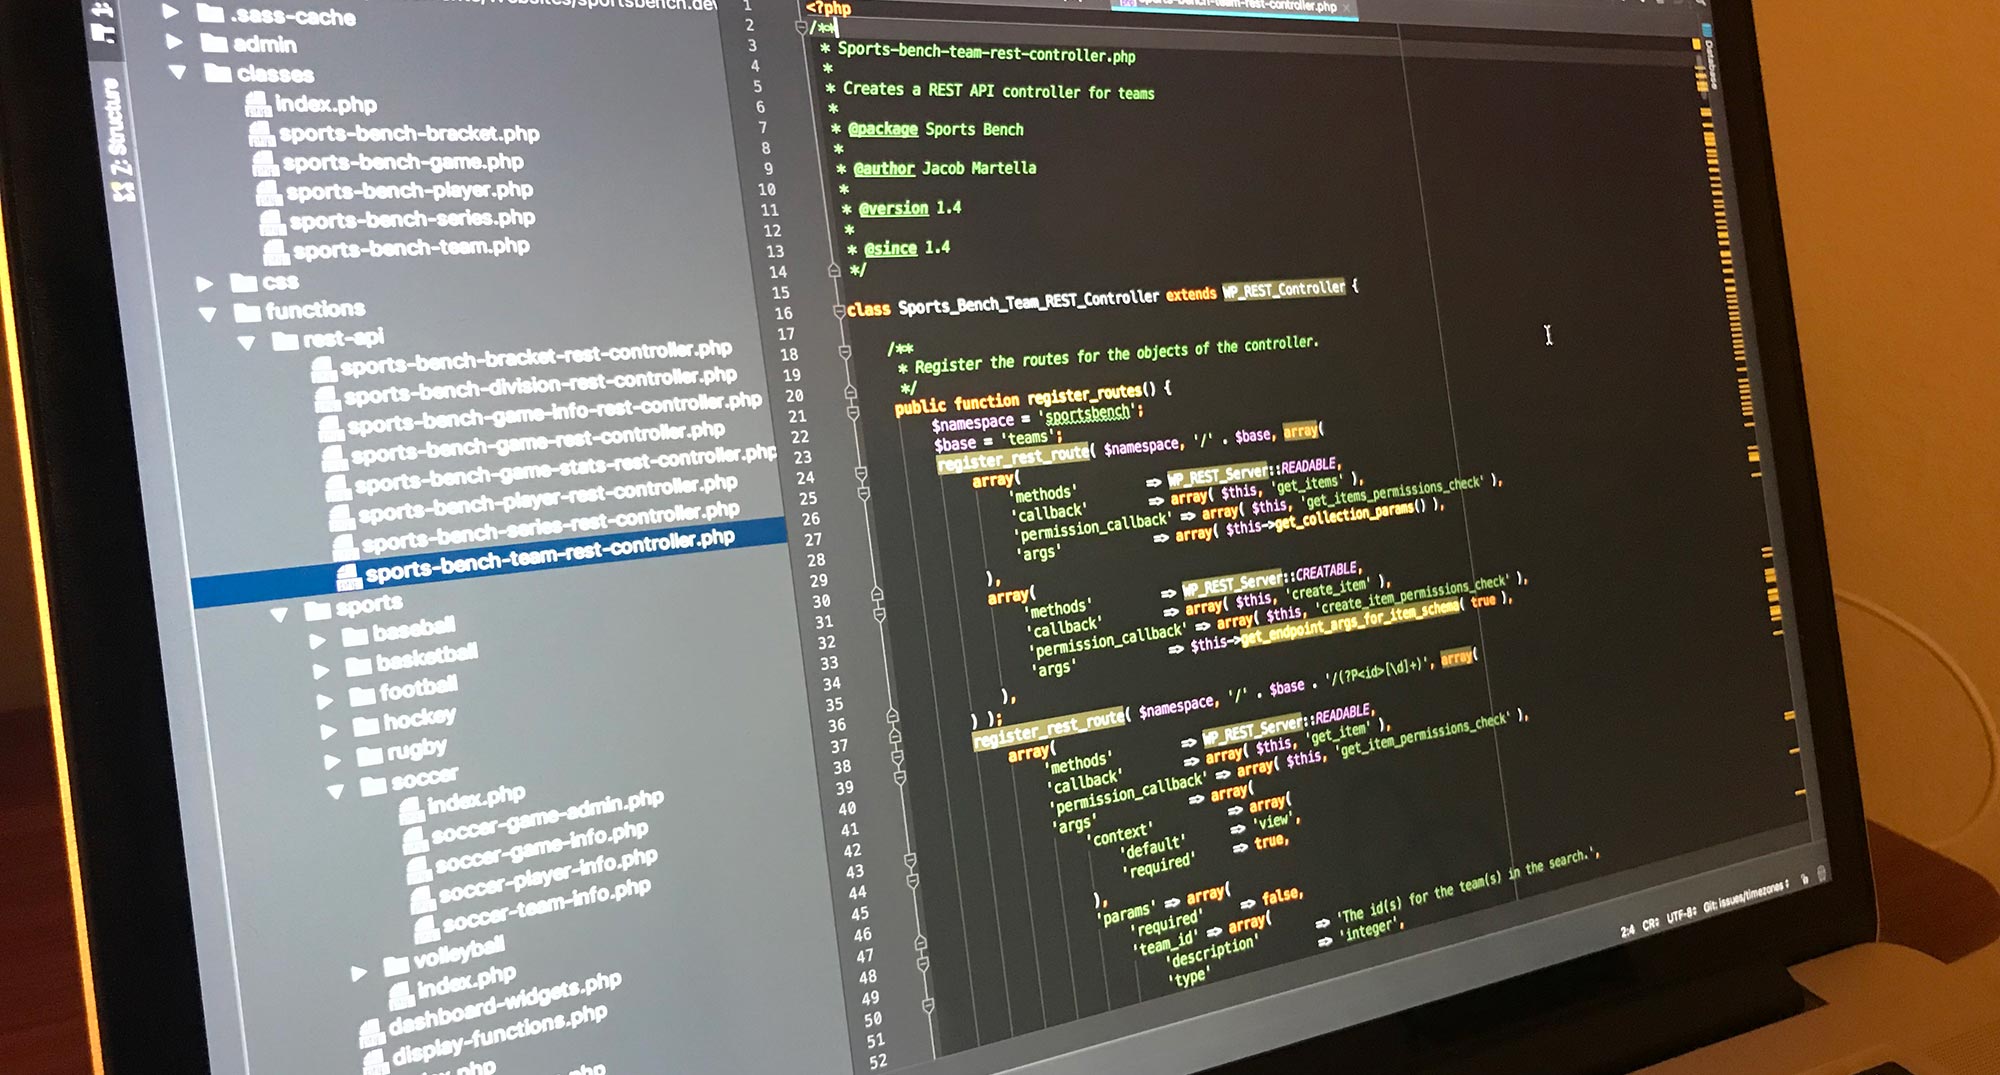
All right, so the first thing we need to do is add the controller class and get it set up so we can start adding code to make it work with our data. Below I have the base REST controller for teams in my Sports Bench plugin. I’ve hollowed out all of the functions that create, read, update and delete teams. We’ll worry about that later.
https://gist.github.com/ViewFromTheBox/bd5b3bf85dd396fcba1689efecfe5505
So once you’ve got this set up, let’s go through what you’ve just pasted. This is a subclass of the WP_REST_Controller, which is how you add your custom route and set it up for use in the REST API.
Next, change the route name and endpoint. The route name is similar to the wp/v2/ that you see in the regular REST API. Change that to you plugin slug or something custom. Then the base is the name of the data we’re getting. So for my plugin, that’s obviously going to be sportsbench for the route and teams for the base.
The next set of interesting information is the permissions checks. Since teams are going to be front-facing data always, I’ve made the check for getting item(s) return true so that you don’t have to be logged in to get that info. Otherwise, you must have edit access to be able to create, update and delete. You can change that to whatever you want.
Other basic functions we need
With that out of the way, let’s look at three other functions in here that we’ll need globally in our class.
https://gist.github.com/ViewFromTheBox/41c53819c70e4a9a60854afdf7f08f0a
So let’s walk through what we’ve just pasted into our code.
In the prepare_item_for_database function, essentially we’re sanitizing the data so that it’s able to go into the database nice and clean. Then the prepare_item_for_response escapes our data that we’re going to be sending to the client. You don’t need to worry about anything that’s related specifically to teams, so the first three lines of that function will work for you.
Next, we put into an array the parameters that the client can search for. So with teams, you can search for team name, team location, team division and so on and so forth. We’ll also be using these in the next section.
Finally, we set the item schema. To be honest, I’m still not quite sure what this does, but I would suggest at least putting the primary key or ID for the data item. Now, let’s get to the super fun stuff.
Getting item(s)
So now that we’ve got the basics out of the way, let’s start doing some cool things. The next set of functions is how we are going to get the teams or teams.
https://gist.github.com/ViewFromTheBox/f9a390bc4b82fa84bd33bb562307b61a
So the get_teams and get_team functions are super simple. Essentially, we take the data, we pass that to another function. If that function returns data, we send it to the client. Otherwise, we send an error.
The sports_bench_get_team function returns a single team, although I’m using the team class to run the MySQL to grab the data. So you’ll to use MySQL or your own custom class that does that for you.
And finally, the sports_bench_get_teams function runs through all of the potential parameters and sees if the client has included them. Then it creates the appropriate MySQL so that we can run it and grab all of the teams that fit those parameter and return it. Do note that you need those isset() functions in the if statements to avoid errors being thrown.
I should note that the Sports Bench specific functions can be inside the get functions, or you can put them into your own custom functions.
Creating items
So now we know how to get items, so let’s create some items to get.
https://gist.github.com/ViewFromTheBox/fe4d13914ac9e7c74462bfdbf8dc5d79
The functions above are super simple. Like the get_items and get_item functions, the create_item is pretty basic. We take the data, send it to a function to create the item and then return whether it was successful or not.
As for the function to actually add the item, first we’re going to check the database to see if it’s already there. If it is, we’re going to suggest to the client to update the item instead. If it’s not, then we’ll run the MySQL to insert it into the table. See, very easy.
Updating items
Now now that we have items and can read them, let’s add the ability to update those items. After all, data doesn’t stay the same for long.
https://gist.github.com/ViewFromTheBox/20391ec862e4615d51b5cc6d770cb71a
Again, the update_item function is super simple. We take the data, pass it to another function and then send the result to the client.
As for the function actually updating the data, we again run a check to see if the item is in the database. If it’s not, then we’ll direct the client to add the item instead. If it is, then we run the MySQL to update the item. Simple as that.
Deleting items
And finally, let’s take care of deleting items. Like everything else, this is going to be pretty easy.
https://gist.github.com/ViewFromTheBox/2ca56ba8e825649c919f88109d54e35b
Again, the delete_item function passes the data to our other function and then returns the result to the client. Meanwhile, our other function runs a check to see if the item is in the database. If it’s not, we return an error to the client. If it is, we simply delete it. See, very simple once again.
Hooking it into code
Now there’s one more thing left to do: hook this new file into our plugin. So here’s how to do that.
https://gist.github.com/ViewFromTheBox/e6b9d27e514e25336a91a2a87b28ea43
The main thing is to load in our REST API controller class and then initialize it and run the register_routes method. And once we do that, our controller will be usable.
In conclusion
So as you can see, once you go through the code methodically, creating a custom WP REST API controller is very simple. You can find the gist of the Sports Bench team REST controller on my GitHub to use as a guide for your own REST controller.
Even after a year since it’s inclusion into core, I’m still really excited to see what people can do with the REST API. I’ve tried recreating this site with the REST API and VueJS, but I’ve run into other plugins that don’t quite support the API. I hope that changes and maybe this tutorial is a part of that change.

4 responses to “A simple guide to adding a WP REST API controller”
hi, thanlks you.
but when i used method GET then i test api with method GET , it return “rest_missing_callback_param”
Hi Jacob
Great guide, but what is:
$the_team = new Sports_Bench_Team( (int) $team_id );
doing, I know its making a new object of the class Sports_Bench_Team, but what is this class doing.
Is it extended from another abstract class, because the get_permalink() method is invoked later?
Hope to hear from you
Hey Jacob,
Sorry for the late reply. I’ve started a new job and it’s been an adjustment. I’m glad you like the guide. That class simply creates a new team object that makes it easier to get things like wins and losses and the team’s schedule and so on and so forth. Don’t have to keep writing MySQL commands over and over to do simple things.
Thanks for share this amazing tutorial